This easy beaded wrap bracelet is such a fun and pretty accessory for the summer months. It has a beachy look to it and the small seed beads are a beautiful turquoise shade that I always seem to love when the warm summer days start kicking in.
I’ve always loved making beaded jewelry, for as long as I could remember honestly! It’s never been a complicated process for me as for how I make my beaded jewelry. I just add the beads onto my thread, tie it up a few times into a very tight knot and I’m done. This bracelet came together exactly that way. It’s a very easy seed bead bracelet that anyone can make. All you will truly need is a lot of patience because the tiny little beads take some time to thread through your string but once your done, days or years later 🙂 you’ll have a beautiful wrap bracelet perfect for summer.
(FYI: The beads I’m using are labeled “turquoise green” but I am linking to beads that are “dark green” because that’s all I could find on Michaels website)
I started by adding a few beads into my container and then stringing my beads.
I know it’s common to measure and cut your string before starting to string your beads but that’s something I’ve never done when making my bracelets. This is because I find it so easy to just start adding my beads to the string and measuring onto my wrist as I go.
But If you wish, you can always measure your wrist first and then cut your string before starting. Just be sure to give yourself enough string so that you can easily tie your bracelet once your done. You can also use a small clipboard to hold your string on one end while you add your beads so that they don’t fall off as you make your bracelet. It’s so horrible when that happens!
The only difficult part about this bracelet is that the beads are very tiny so it really took a lot of patience to finish. The hole of the beads is so tiny and makes it difficult to pass the string through. There were different sizes available when I bought my beads so you can always pick a larger bead but I really wanted to use these tiny beads so I just pushed through (as I pushed my beads through 🙂 don’t mind my cheesy humor)
Once I had my desired length I tied my string a few times to a very tight knot (about 4-5 times) and this is when I cut my string.
What’s fun about wrap bracelets is that you can get away with using them as a necklace or ankle bracelet depending on how long you make it.
I may use mine as a necklace but it will mostly be a bracelet for me. I would say to use a string that is not very stiff if you’d like to use it as a necklace as well. My string is nice because it’s strong and doesn’t fray at all but it can also be very stiff so that makes for a necklace that doesn’t lay nicely.
And that’s it. An easy turquoise beaded wrap bracelet for the beautiful summer months, or anytime of the year!
Sending happy, safe, and healthy vibes your way. May God bless you and your family today and every beautiful day to come!
I’ve made beaded bracelets that I love for everyday wear.
Bracelets that are perfect for Summer wear.
Holiday-appropriate bracelets.
Bracelets that remind me of the water…
….of candy canes.
But today I’m sharing a black beaded bracelet that is somewhat on the simple side but considered (in my eyes at least) to be “dress up” appropriate.
I love beaded bracelets because they can work with so many different outfits as well as occasions. When I first decided to make this bracelet I wanted to make something that could work with dressy outfits. Eventually I figured that black would be a good color to try. It’s not necessarily my favorite color but who can argue with the fact that it almost always seems to work when we have a special event or just want to dress up for the day!
Little black dress, please meet…
My black beaded bracelet
Simple Black Beaded Bracelet
I used a set of black beads that brought five different sizes to choose from.
I alternated between the largest and smallest size in the set to make my bracelet.
As for the string, I used a 0.7mm clear elastic string to make my bracelet and finished with a few tight knots once I had my perfect size (at least 3 or 4 knots) You can use a small amount of glue if you’d like to secure your knot but I have been lucky enough to make my bracelets without using glue and never have them break on me.
(Please excuse the darker photos below, daytime photos and nighttime photos never quite look the same when taken by someone (me) that doesn’t have the best photography skills 🙂
Thanks for stopping by.
Sending happy, safe, and healthy vibes your way…May God bless you and your family today and every beautiful day to come!
12 of My Favorite Color Combinations for Emerald Green Beads
I found these gorgeous emerald green beads a few months ago.
When I ordered them I didn’t realize just how beautiful they would truly be in person.
I had planned on making a few bracelets before they arrived but something happened when I finally had these precious little beads in my hands and started working with them…
I was completely stuck!
Aside from a few bracelets all in green, I had no idea what else to do with them.
What colors would go with emerald beads?? And what would I wear with this dark green color when I was done?
What a dilemma.
So I decided it may be fun to write a post all about what colors (I think) would look great with emerald green beads as well as how you can mix these colors to create a few pieces of beaded jewelry.
I also added a few ideas on what you can wear with emerald beaded jewelry because maybe like me you are also wondering how to style this color (not that I’m a fashion expert at all but hey, one can always dream)
Before I get started, I should mention that the only new beads I’m working with are the green beads. Everything else that you will see below came from beads I’ve owned for some time now and a few other beads (like the purple and gray) came from old pieces of jewelry that I didn’t want anymore and took apart.
The same goes for all of the clothing I photographed. I just went digging through my closet to give you a few ideas as for what I think goes with green beaded jewelry. Being that this is not a fashion blog I tried to keep things simple and focus on basic colors and patterns that anyone can easily find in their own closet. I will try to link to whatever I can but honestly, most of these pieces have been in my closet for years.
FYI, I’m calling these beads emerald green but they are actually called “peacock green” when you click on the link provided.
White
There were a few colors that I considered to be the neutrals of the bunch. Colors that would go with anything.
This is one of those neutrals.
White can probably be paired with any color you can think of and this emerald green is no exception.
I picked a few pearls for the bracelet below but you can also see how white seed beads pair with the green beads in the gold example below as well as the turquoise.
Gold
When I started working on this blog post I decided to do a quick search on Pinterest for emerald green beaded jewelry.
Gold was the color that seemed to be most used for pairing with emerald green.
I can see why. It goes beautifully together.
I can see myself wearing these two with gold accessories, a pair of white leggings, and any green top I can find in my closet…
Mint Green
How can these two colors not work great together!
That soft mint green paired with the more vibrant, darker emerald green really compliment each other beautifully.
I mixed in some white and brown to bring this bracelet together but of course, the two colors would work perfectly on their own as well!
Yellow
I wasn’t sure how this one would turn out at first. Would it remind me of a bowl of lemons and limes?? Have I outgrown a yellow and green beaded bracelet at my (fabulous) age of 38 (plus, plus)?
But I LOVE yellow so I had to give it a try.
After pairing these two colors with a few crystal clear beads and wearing it against a dark gray outfit and a few silver accessories I realized just how much green and yellow can go together.
Gray
I was settled from the beginning on NOT including gray.
I was convinced before even giving it a chance that it wouldn’t work.
Then I saw a green and silver necklace on TV and a few days later the bracelet you see below was born.
I’ll probably wait for winter to wear this one so I can pair it with black velvet leggings (I love leggings) and a simple white tee.
Brown
How can I not include this one?
Brown and green were inspired by nature. Think of trees full of green leaves and brown tree trunks. It’s a beautiful sight! (Unless you have allergies, then you may not find it so interesting)
This one is a match made in heaven!
Purple
My daughter loves the movie Frozen. She watches it almost every single afternoon. Elsa and Anna’s outfits at the beginning of the movie both have a deep purple as well as green in it.
That’s where this color combination came from. (You know you are a mommy when your inspiration comes from Disney movies)
Purple and emerald green are two rich colors that, in my opinion, complement each other perfectly. Mix them with gold seed beads and I don’t think it can get any better!
Mix gold, leopard, and black with this one and your outfit is complete.
Sky Blue
Ok, I have to stop right here for a minute.
Gold and green may be pure perfection, yellow and green will just put a smile on your face, brown and green must be born from heaven but this sky blue shade and emerald green…
If this doesn’t work then I don’t know what does!
It screams colors of tropical waters in the Caribbean.
It makes me want to head out to the beach.
Orange
At first, I battled with this one.
In my mind it was going to work but on a string, well, orange took some effort.
After pairing the orange and green with white beads I think it works great.
I probably wouldn’t wear orange and green together in an outfit but would I wear it as a pop of color in my accessories?
Any day of the week! (Maybe even for laundry day)
Try a light washed pair of blue jeans, a summery top, and a few matching accessories to throw on with this bracelet.
Black
Black is one of those colors that can go with just about everything.
It’s another neutral just like the white.
This is another favorite of mine (ok they may all be my favorite 🙂
But just look at how pretty the black seed beads look with those emerald green beads.
This one is a winner for any date night in my book.
Crystal Clear
Technically clear may not really be a color but when it comes to beads, I think it’s okay to include this one.
This one is another neutral like the black and white.
It really lets the beautiful dark green stand out while adding just a little extra sparkle.
Different Shades of Green
When in doubt…
Use all the shades!
Mix together dark greens, bright greens, green greens and you’ll end up with a fun and happy little piece of handmade jewelry.
Well, that’s it!
12 of my favorite colors to combine with emerald green beads!
Now there’s only one problem…
I have 16 green bracelets but only seven days in the week to wear them all?
ok friends, thanks for stopping by and checking out my blog!
Sending happy, safe, and healthy vibes your way…May God bless you and your family today and every beautiful day to come
Please don’t forget to pin and share with friends if you liked this post.
Tell me one of your obsessions and I’ll tell you one of mine…
It’sjewelry.
I’ll (usually) enjoy jewelry anyway it comes.
Beaded jewelry, silver, gold, homemade, affordable or expensive. It doesn’t really matter to me. I’ll probably give the piece of jewelry a chance, and to some extent, I will most likely fall in love with each unique piece.
So I decided I had to blog about it.
I have always had an interest in jewelry.
(FYI: I’m about to chit chat for a bit about my obsession for jewelry. Feel free to skip this paragraph if you wish. I won’t be offended 😉 ) While in high school, I majored in jewelry making. Yes, you read that correctly, jewelry making. I dreamed of a career that involved jewelry. Somehow or another though, I ended up in dental hygiene. Not exactly what I had in mind back in high school, but that’s ok. As a young girl I remember always loving anything considered jewelry but I was especially drawn to beads. I loved that I could create something with just a few beads and some string. Well, I would actually just grab some of my mom’s sewing thread from her sewing machine. I didn’t even realize there was string sold specifically for this little hobby of mine. I’ll never forget when this love for jewelry really started to grow. It was when my sister’s friends mom gave me a bag full of beads that she had laying around her home. She knew I loved beads. I have no idea how she knew honestly, all I know is that I was in heaven. Little did this generous lady know she was giving me something that I would cherish and play with all throughout my childhood. I still have the collection to this day! Or at least whatever survived the many times I dropped those beads ALL OVER THE LIVING ROOM FLOOR as a kid. My poor mom, always having to pick up the mess! Eventually, she bought me a case to store all of my beads. Probably in an attempt to save me, and the rest of my family from one day slipping on one of those beads and breaking a few bones! Well, I could go on and on about my love/obsession for jewelry but I really want to get back to what this blog post is really about. So I’ll stop for now.
Today I’m sharing an easy DIY for stackable stretch bracelets.
I love stackable bracelets.
You can…
take ‘em apart and wear one or two at a time.
Wear them with your watch.
Mix them up with other bracelets.
Or stick to what they were born to do, stack them all up on to their life long best friend, yourwrist.
Ok, let’s get started with this easy DIY.
Here we go…
Easy DIY Stackable Stretch Bracelets
Here’s what you’ll need:
Beads
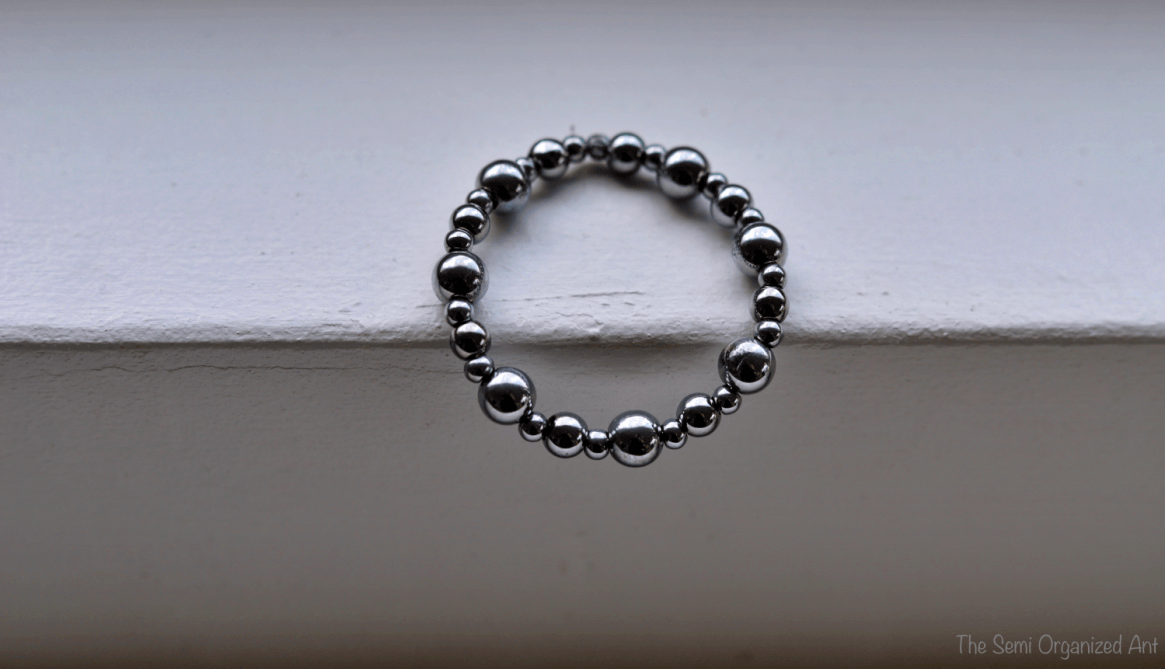
I’m using silver beads of different sizes that I recently found at Walmart.
What I mean by pattern is how you want to string the beads if you are working with different sizes or colors. For example, you can do a large bead followed by a small bead then large again and continue with that pattern.
I’m using four different patterns (pictured at the end) but you can repeat the same pattern for each bracelet or mix it up however you wish.
Step 2
Grab your elastic string of choice and jump right into stringing your beads. Don’t cut any string yet. We’ll take care of that later.
Step 3
Measure the string of beads on your wrist as you go. Stop adding beads once you’ve reached the perfect size for your wrist.
Step 4
Make a few tight knots to secure your bracelet. I usually make about 4 -5 knots, sometimes I throw in a few more if my fingers need of a workout 😉
Step 5
Cut your string.
Step 6
Apply a few drops of glue for extra security.
I have to admit, I’ve been making stretch bracelets ever since I could remember and I’ve never used any glue. BUT, I’m a mommy now, and my daughter is always playing with my jewelry and stretching my bracelets till her little heart’s content, so I need the extra security now. I never had any issues with my bracelets breaking without the glue so it’s completely up to you if you want to do this. I have to admit though I do like the extra security baby or no baby pulling at my bracelets.
Step 7
Now, the hardest part. Let your glue dry overnight.
That means you can’t wear them till the next day.
I know, the world is ending.
Step 8
Okay, you know what comes next, but I couldn’t end this fun DIY with “the world is ending.”
On the next day…
when the sun is shining and your coffee (or tea) is in your hand…
go grab your stretch stackable bracelets…
pull them onto your wrists…
and put a smile on your face my dear friend…
BECAUSE YOU JUST MADE YOURSELF A BEAUTIFUL STACKABLE STRETCH BRACELET!
Here’s a better look at the four different patterns I decided on:
(and yes, I had to give each pattern a name, why not have some fun)
the classic look
The kind of basic (but just as pretty as the rest) look
The lumpy bumpy look
And the no rhyme or reason look
Wear them all together, and they blend into one another perfectly
I hope you enjoyed this easy DIY!
ok friends, thanks for stopping by and checking out my blog!
Sending happy, safe, and healthy vibes your way…May God bless you and your family today and every beautiful day to come
Please don’t forget to pin and share with friends if you liked this post.